Tutorials - add a C++ backend to your QML app
Whether you are creating a new app or porting an existing one from another ecosystem, you may need more backend power than the QML + JavaScript duo proposed in the QML app tutorial. Let's have a peek at how to to add a C++ backend to your application, using system libraries or your own, and vastly increase its performance and potential features.
In this tutorial, you will learn how to use and invoke C++ classes from QML and integrate a 3rd party library into your project.
The SDK template
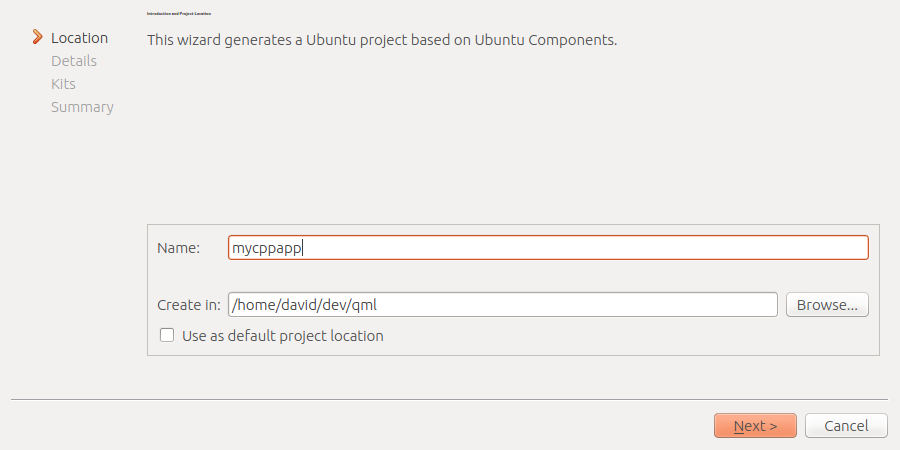
Let's start by opening the Ubuntu SDK and click on New Project to be presented with the project wizard. For this tutorial, we are going to use the QML App with C++ plugin (cmake) template.

Continue through the wizard by picking:
- A project name. For the sake of consistency during this tutorial, let's use "
mycppapp" - An app name (
mycppapp)

- Enter your developer information

- Choose a framework (if you are unsure about which one to use, see the Frameworks guide). For this tutorial, we are going to use
ubuntu-sdk-15.04.

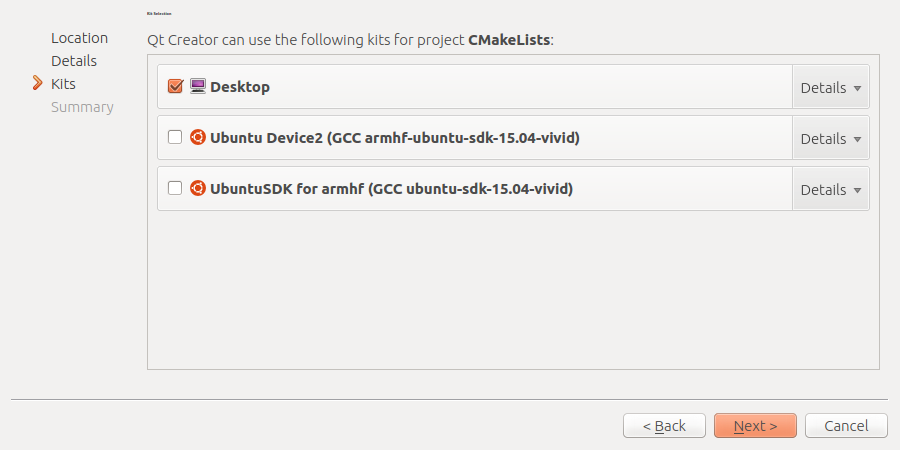
- A kit corresponding to the type of device and architecture your app will be published for. For this tutorial, we are only going to use a
desktopkit.
Template files
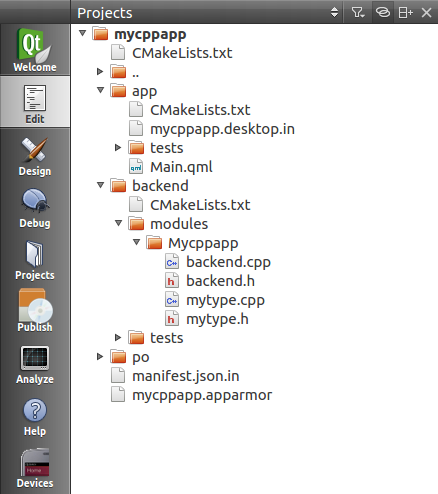
After creating the project, the SDK has now switched to the editor tab. If you are already used to QML-only apps, you can see a slightly different file tree on the left pane:

An app folder for QML files and the desktop file, a backend folder for
C++ modules and tests, and a po folder that will hold generated
translations templates.
Other files worthy of a note are manifest.json.in and mycppapp.apparmor,
both needed for packaging. Since we are using the CMake build tool, each
directory also contains a CMakeLists.txt file.
Manifest.json.in, app/mycppapp.desktop.in and mycppapp.apparmor have
already been pre-filled with the information you entered in the wizard. You
can edit them to manage your app version, maintainer info, change the
framework and permission policies your app is going to use. We are not going
to use them during this tutorial, you can safely ignore them.
Running the template
If you run the app provided by the template (by pressing Ctrl+R or clicking the green Play icon), you can see that it looks similar to a standalone QML app, the big difference is that the QML object used to display the "Hello world" string is actually a class imported from C++.

First example - Calling the command-line
In this example, we are going to learn how to call the command line (and get its output) from a QML UI.
Note that what you will be able to do (in terms of command line use) on a device other than the Ubuntu desktop will be fairly limited due to our app confinement policies, but this will be a good introduction to exchanging data between the backend and the UI.
backend/modules/Mycppapp/mytype.h
Currently, this file defines a MyType class with a very simple API: it
receives a string and returns it.
Let's change it to a Launcher class, using
Qprocess to run system commands.
Replace the content of the file with:
#ifndef LAUNCHER_H
#define LAUNCHER_H
#include <QObject>
#include <QProcess>
class Launcher : public QObject
{
    Q_OBJECT
public:
    explicit Launcher(QObject *parent = 0);
    ~Launcher();
    Q_INVOKABLE QString launch(const QString &program);
protected:
    QProcess *m_process;
};
#endif
mytype.cpp
Now, we are going to make use of this Launcher class. It will receive
strings from QML, interpret it as a command, wait for the command to finish
and return the output.
Replace the content of mytype.cpp with:
#include "mytype.h"
Launcher::Launcher(QObject *parent) :
    QObject(parent),
    m_process(new QProcess(this))
{
}
QString Launcher::launch(const QString &program)
{
    m_process->start(program);
    m_process->waitForFinished(-1);
    QByteArray bytes = m_process->readAllStandardOutput();
    QString output = QString::fromLocal8Bit(bytes);
    return output;
}
Launcher::~Launcher() {
}
backend.cpp
This is where the QQmlExtensionPlugin is used to register C++ classes as QML
Types, that you will be able to use in your UI.
The syntax is fairly explicit, and the most important line of this file is where the type registration is made:
qmlRegisterType<MyType>(uri, 1, 0, "MyType");
Since our class is now called Launcher, We need to change it to:
qmlRegisterType<Launcher>(uri, 1, 0, "Launcher");
That means that from the QML side, you now have access to a Launcher type
with a launch function taking a string and returning the terminal output. How
cool is that?
QML side
In Main.qml, let's replace the content of our page component with a very
simple UI
Page {
    title: i18n.tr("mycppapp")
    // Here, we instantiate our Launcher component
    Launcher {
        id:launcher
    }
    Column{
        anchors.fill:parent
        spacing: units.gu(2)
        anchors.margins:units.gu(2)
        Row {
            spacing: units.gu(2)
            TextField{
                id:command
            }
            Button{
                id:button
                text:i18n.tr("Run")
                onClicked:{
                    // And we call its launch function
                    // when the Run button is clicked
                    txt.text = launcher.launch(command.text)
                }
            }
        }
        Text{
            id:txt
        }
    }
}
Run the app and enjoy a tiny shell access!

Second example - Integrate an external library
In this example, we are going to use a very straightforward SVG drawing library (simple-svg) which comes as a standalone header file, and turn our first example above into an SVG graph plotting app.
Accessing the library
Let's start by downloading
simple_svg_1.0.0.hpp , rename it to
simplesvg.h and add it to the rest of our source files (in
backend/modules/Mycppapp/).
Then, we edit mytype.h to slightly change the structure of our launch
function
From
Q_INVOKABLE QString launch(const QString &program);
To
Q_INVOKABLE void draw(const int &width, const int &height, const QString &array);
We now have a draw function that takes a width, a height and a string (which
will be a stringified, space separated, array of integers).
The draw function
It’s time to flesh out our SVG generating function in mytype.cpp
First, a few more includes at the top of the file :
#include "mytype.h"
#include "simplesvg.h"
#include <iostream>
#include <string>
using namespace svg;
Then, we need going to replace our launch() function, that takes a string
from QML:
QString Launcher::launch(const QString &program)
{
    m_process->start(program);
    m_process->waitForFinished(-1);
    QByteArray bytes = m_process->readAllStandardOutput();
    QString output = QString::fromLocal8Bit(bytes);
    return output;
}
...by a draw() one, still using data sent from QML:
It makes heavy use of functions and classes provided by the bundled SVG library
void Launcher::draw(const int &width, const int &height, const QString &array)
{
    // Create the SVG doc
    Dimensions dimensions(width, height);
    Document doc("../mycppapp/app/graph.svg", Layout(dimensions, Layout::BottomLeft));
    // Parse our string into an array
    std::istringstream buf(array.toStdString());
    std::istream_iterator<std::string> beg(buf), end;
    std::vector<std::string> tokens(beg, end);
    // Create a line
    Polyline polyline_a(Stroke(1.5, Color::Cyan));
    // Iterate over our array to define line start/end points
    for( int a = 0; a < tokens.size(); a = a + 1 )
    {
        if (tokens.size() < 2) {
            polyline_a << Point(width/(tokens.size())*(a), atoi(tokens[a].c_str())) << Point(width/(tokens.size())*(a+1), atoi(tokens[a].c_str()));
        } else {
            polyline_a << Point(width/(tokens.size()-1)*(a), atoi(tokens[a].c_str()));
        }
    }
    doc << polyline_a;
    // Save the doc
    doc.save();
}
On the QML side of things, you can now call Launcher.draw() with(width,
height, points) as arguments to generate a SVG file!
QML UI
Here is our QML UI using the draw() function in Main.qml
Page {
    title: i18n.tr("Graph")
    id:page
    Rectangle {
        anchors.fill:parent
        Launcher {
            id: launcher
        }
        TextField{
            id:txt
            width:parent.width - units.gu(4)
            anchors.top:parent.top
            anchors.horizontalCenter:parent.horizontalCenter
            anchors.margins:units.gu(2)
        }
        Row {
            anchors.top:txt.bottom
            anchors.horizontalCenter: parent.horizontalCenter
            anchors.margins: units.gu(2)
            spacing: units.gu(2)
            Button {
                id:drawButton
                anchors.margins:units.gu(2)
                text:i18n.tr("Draw")
                enabled:(txt.length)
                color: UbuntuColors.orange
                onClicked: {
                    launcher.draw(page.width, page.height, txt.text)
                    img.source = ""
                    img.source = Qt.resolvedUrl("graph.svg")
                }
            }
            Button {
                id:clearButton
                anchors.margins:units.gu(2)
                text:i18n.tr("Clear")
                onClicked: {
                    launcher.draw(page.width, page.height, "")
                    img.source = ""
                    img.source = Qt.resolvedUrl("graph.svg")
                }
            }
        }
        Image {
            id:img
            anchors.fill:parent
            anchors.margins:units.gu(2)
            cache:false
            source: Qt.resolvedUrl("graph.svg")
        }
    }
}
That's it! Our simple QML app is ready to use: enter some Y-axis values in the input field and it will generate and display a SVG graph.

Packaging
The packaging process is as simple as others applications. The Publish tab
allows you to package it as a .click and the template CMakeLists are here
to make sure everything is included in your build.
If you add libraries bigger than standalone header files, you can use the
existing CMakeLists files in the template as a starting point on how to
include them as modules.
As an example, here is the CMakeLists file for our backend directory:
include_directories(
    ${CMAKE_CURRENT_SOURCE_DIR}
)
set(
    Mycppappbackend_SRCS
    modules/Mycppapp/backend.cpp
    modules/Mycppapp/mytype.cpp
)
# Make the unit test files visible on qtcreator
add_custom_target(Mycppappbackend_UNITTEST_QML_FILES ALL SOURCES "tests/unit/tst_mytype.qml")
add_library(Mycppappbackend MODULE
    ${Mycppappbackend_SRCS}
)
set_target_properties(Mycppappbackend PROPERTIES
         LIBRARY_OUTPUT_DIRECTORY Mycppapp)
qt5_use_modules(Mycppappbackend Gui Qml Quick)
# Copy qmldir file to build dir for running in QtCreator
add_custom_target(Mycppappbackend-qmldir ALL
    COMMAND cp ${CMAKE_CURRENT_SOURCE_DIR}/modules/Mycppapp/qmldir ${CMAKE_CURRENT_BINARY_DIR}/Mycppapp
    DEPENDS ${QMLFILES}
)
# Install plugin file
install(TARGETS Mycppappbackend DESTINATION ${QT_IMPORTS_DIR}/Mycppapp/)
install(FILES   modules/Mycppapp/qmldir DESTINATION ${QT_IMPORTS_DIR}/Mycppapp/)
Further reading
- This CMake tutorial should help you getting started with complex CMake projects
- The Qt documentation on integrating QML and C++ will give you a high level overview of integration concepts, such as data type conversion
 Ubuntu Phone documentation