Scopes tutorials - development procedures
Here you can find short procedures for common processes developers need to know about when working with scopes.
Note: You will need to install the Ubuntu SDK before continuing with this tutorial.
Creating a scope
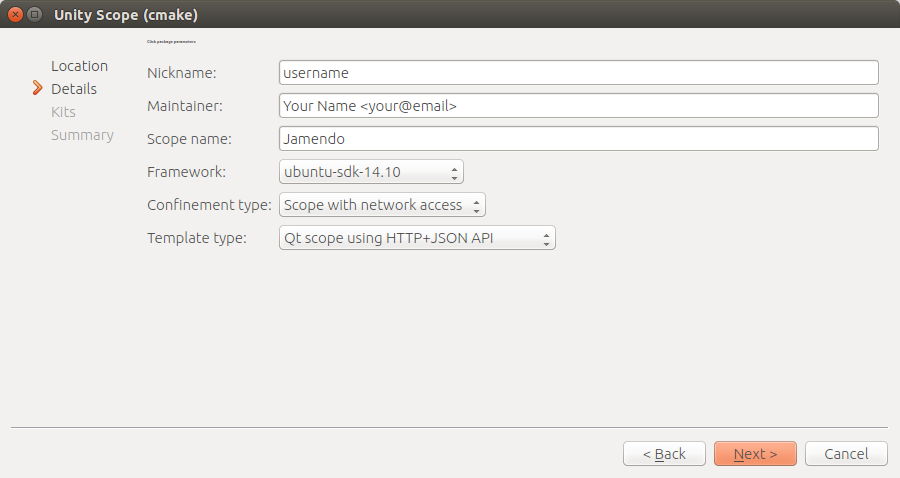
In the Ubuntu SDK, simply create a new project using the Unity Scope template.
File > New File or Project > Unity Scope

Tip: Note that when you build the scope, the generated build is placed by default in the parent directory, in a directory named build-<project name>-<build env>-<build config>'. For example, if your scope project is named‘myscope and you are building for an armhf target, your build directory will be ../build-myscope-armhf-14_10-Default.
Tip: For more info on the Ubuntu SDK, see Ubuntu SDK Tutorials.
Opening a scope project
Scope projects use CMake for building. CMake projects have a CMakeLists.txt file in the root directory (and in many other project directories).
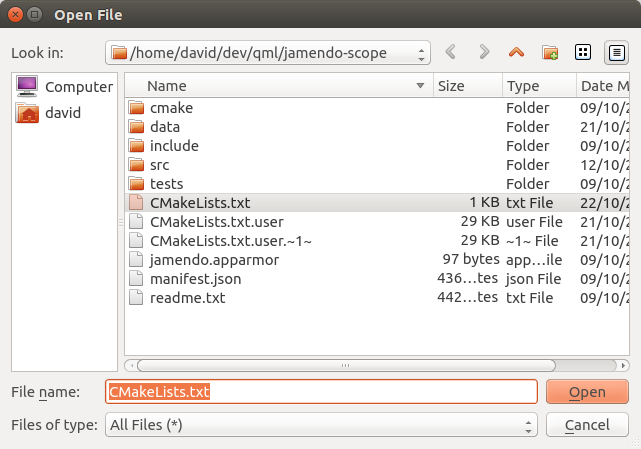
You can open scope projects from QtCreator with the Ctrl+O shortcut
and then navigating to and selecting the CMakeLists.txt file in the project’s
root directory.

Opening a scope branch in QtCreator as a project
If you have a branch or directory containing a scope source tree that is not an already a QtCreator project, you can open it and create a project from it, as follows:
Ctrl+Oto open a file or project (or use the File > Open File and Project menu).- Navigate to and select the CMakeLists.txt file in the source tree, then click the Open button.
- In the Configure Project dialog that displays, choose the devices kits you want your project to be configured for and click the the Configure Project button.

From a terminal, you can also navigate to the directory and run
$ ubuntu-sdk .
Building a scope
Tip: When you click the Run button on the left pane of QtCreator (or press Ctrl + R), your scope is automatically built before starting.
In QtCreator, simply select Build > Build Project MYSCOPE. (You can
also use Ctrl+B) This creates the build directory, which by default
is next to the scope project directory and starts with build-, as described
above.
You can also build from the terminal. Move to the build directory (after it is
created by building at least once from QtCreator) and run: cmake && make
Successful builds generate the following important files in the separate build directory:
BUILDDIR/src/llibMYSCOPE.so: the scope’s shared object used by clients that call the scopeBUILDDIR/src/llibMYSCOPE.ini: the file used to launch the scope, as discussed next.
Running a scope
After creating a new project, you can run it by clicking the Run button on the
left pane of the QtCreator or by pressing Ctrl+R.
Note: By default, QtCreator will try to run the test suite included in the scope template and not the scope itself. Make sure the scope is selected before trying to run it :
- click the left pane project button, the one with the active project name.
- select which device (Kit column) you want to run your scope on
- select the scope itself (Run column), instead of scope-unit-tests

If you are using Ubuntu 14.10, you can run a scope on your desktop, by selecting the desktop as a target device. This runs the scope in a standalone window, with developer tools to tweak the ways results are rendered.

- The scope name or logo displayed in the header is derived from the .ini file
- The left half of the run window is the scope.
- The right half is for development purposes. It allows you to modify the scope in various ways. For example, you can click Override category to edit a Category template that controls how results are displayed.
If you are using an earlier version of Ubuntu, you will need to create an emulator from the Devices page or connect an Ubuntu phone via USB. There is a tutorial for that.
To run a scope from the terminal, simply use unity-scope-tool followed by the path to your scope .ini file (which is in src/):
$ unity-scope-tool src/myscope.ini
Next step
Now that you are ready to make your first scope, you should give a try to the SoundCloud scope tutorial.
 Ubuntu Phone documentation